Enable Suspect Commits
Sentry uses commit metadata from your source code repositories to help you resolve your issues faster. This is done by suggesting Suspect Commits that might have introduced an error right in your issue details page. It also allows Sentry to display Suggested Assignees - the list of authors of those commits and suggest their assignment to resolve the issue.
Now that you've created a release, you can tell Sentry which commits are associated with this latest version of your code --- this is called Commit Tracking.
Step 1: Integrate your GitHub account and repositories
To integrate GitHub with your Sentry org, follow the instructions in the Global Integrations documentation
For the last step, add the
frontend-monitoringrepository from your GitHub account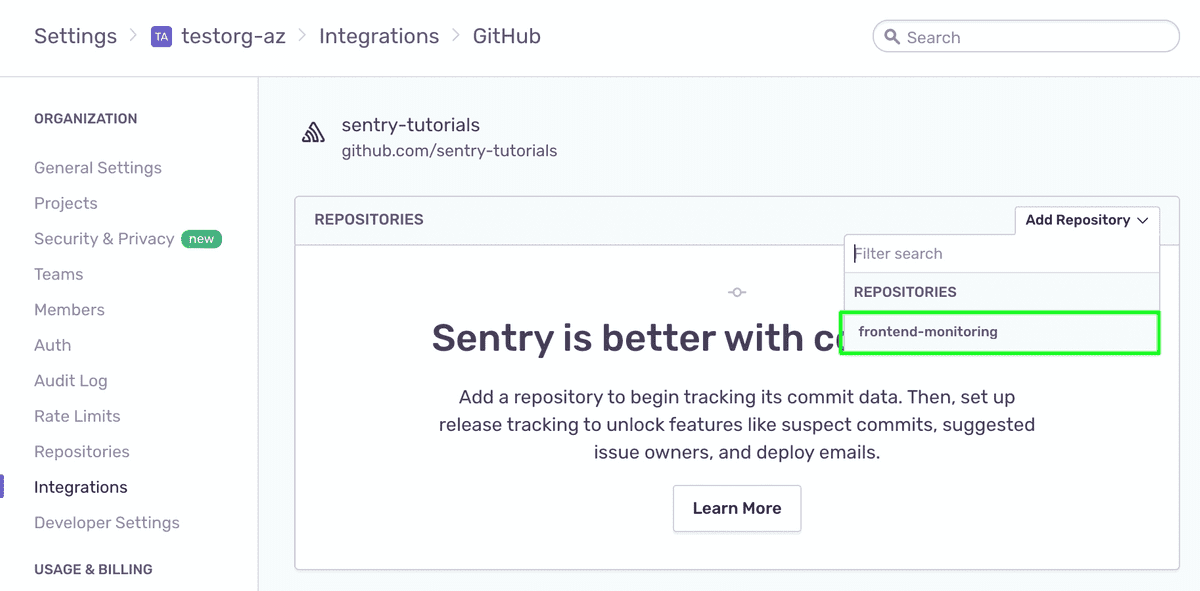
Step 2: Set commit tracking
Now that you've set up releases in Sentry as part of your CI/CD process and integrated your source code repositories, you can associate commits from your linked repository to your releases.
Note: In the demo project, we use a Makefile to handle our build-related tasks. If you are not using the provided React demo code and do not have a Makefile, you could optionally run the
sentry-clicommands used in this tutorial directly from thecommand lineor integrate the commands into the relevant build script.
Open the
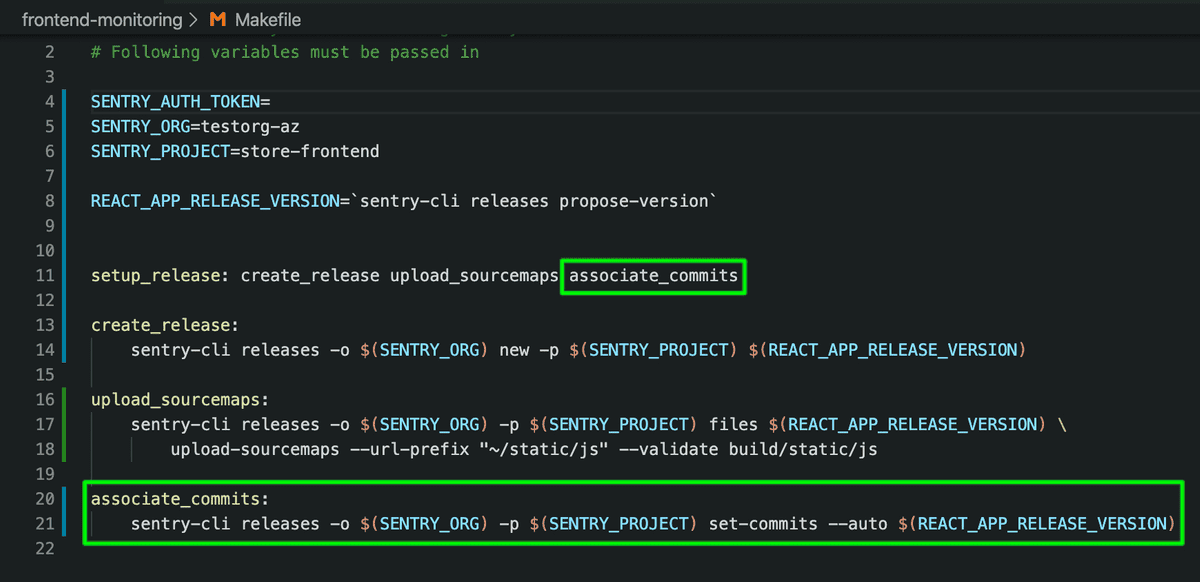
Makefilein your projectAdd the following target at the bottom of the file:
Copiedassociate_commits: sentry-cli releases -o $(SENTRY_ORG) -p $(SENTRY_PROJECT) set-commits --auto $(REACT_APP_RELEASE_VERSION)The command associates commits with the release. The auto flag automatically determines the repository name, and associates commits between the previous release’s commit and the current head commit with the release.
The new target
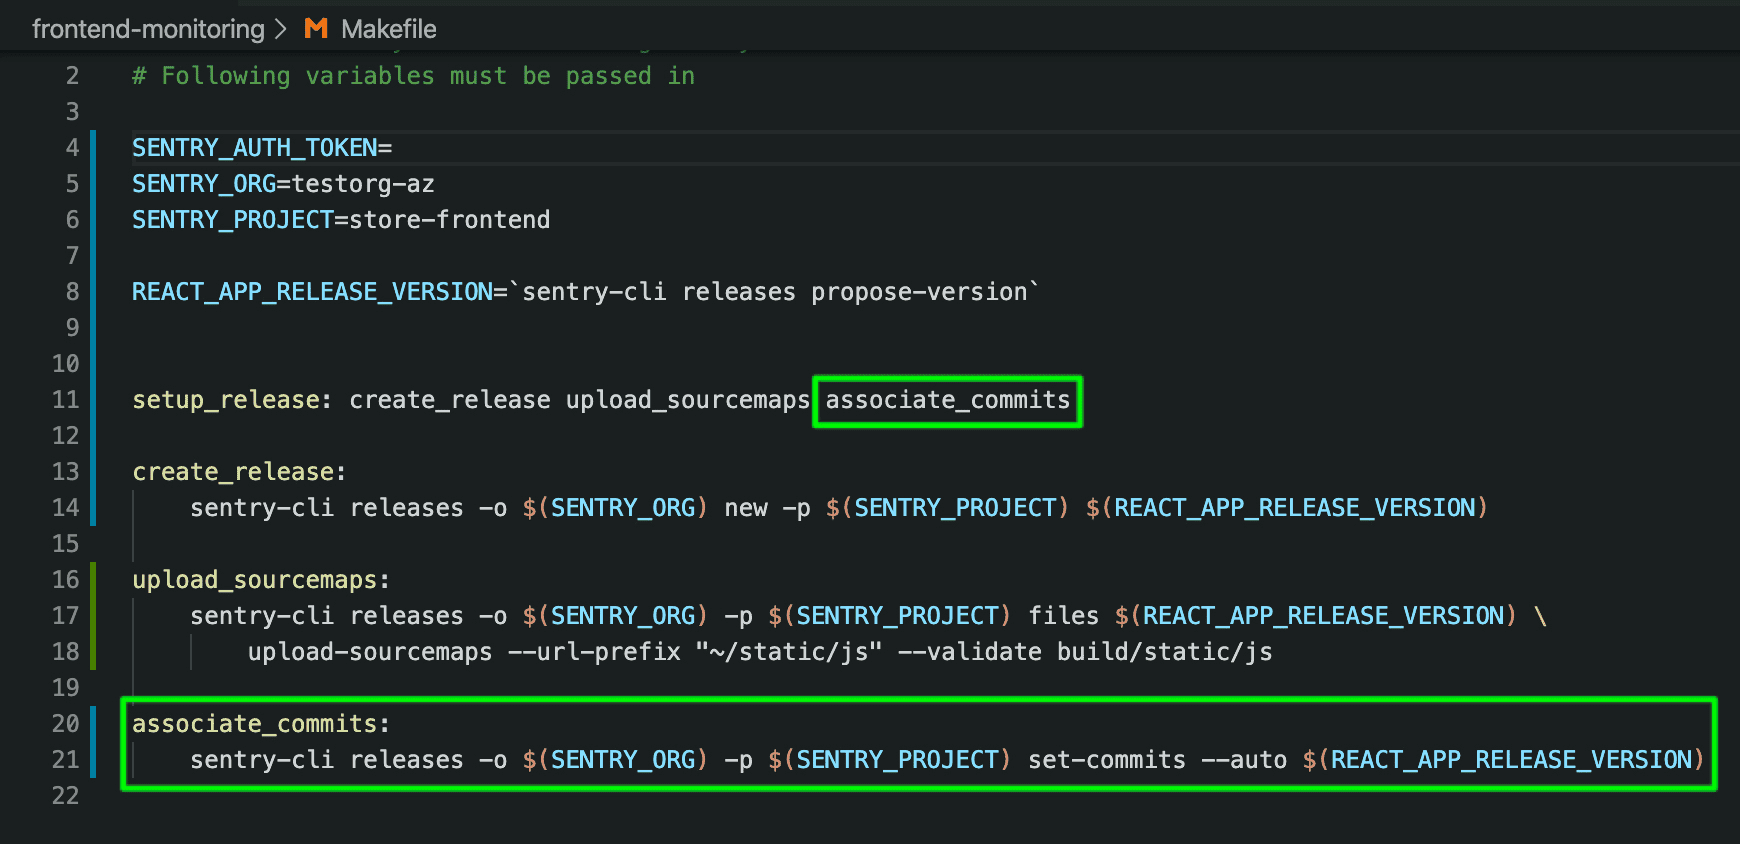
associate_commitswill be invoked as part of thesetup_releasetarget, add it at the end:Copiedsetup_release: create_release upload_sourcemaps associate_commitsYour Makefile should look like this:
If your terminal is still serving the demo app on localhost, press
^Cto shut it downBuild, serve, and restart the project on your localhost by running:
Copied> npm run deployIn the terminal log, notice that the sentry-cli identified the GitHub repository.


Step 3: Suspect commits and suggested assignees
Now suspect commits and suggested assignees should start appearing on the issue page. Sentry determines these by tying together the commits in the release, files touched by those commits, files observed in the stack trace, authors of those files, and ownership rules.
Refresh the browser and generate an error by adding products to your cart and clicking Checkout
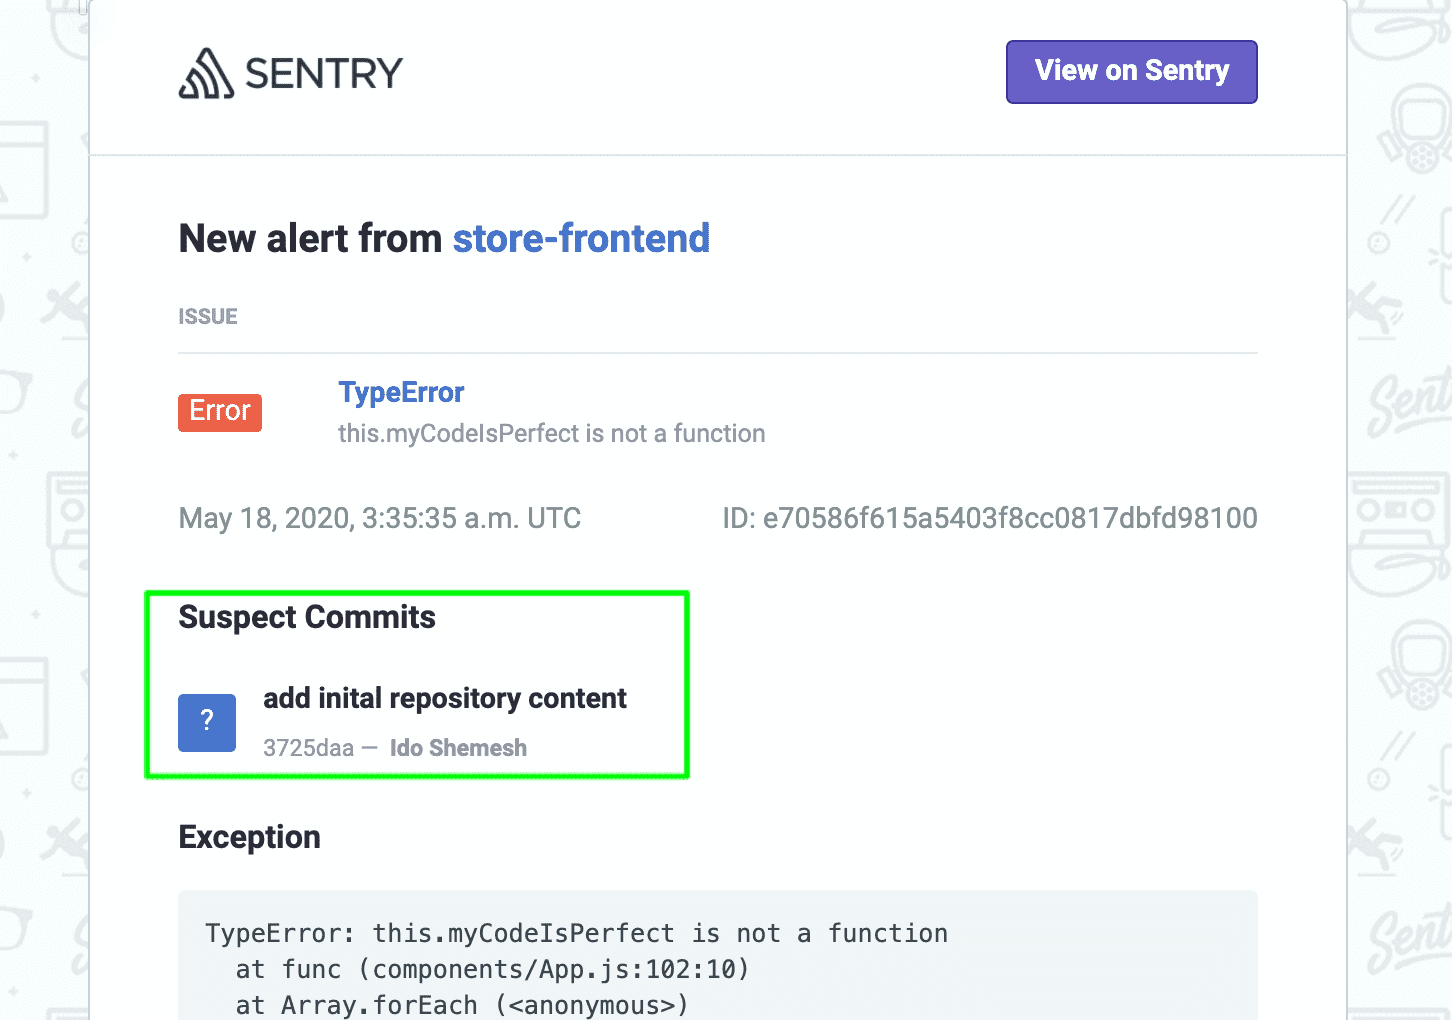
Check your email for the alert about the new error. Notice that a new Suspect Commits section has been added to the email
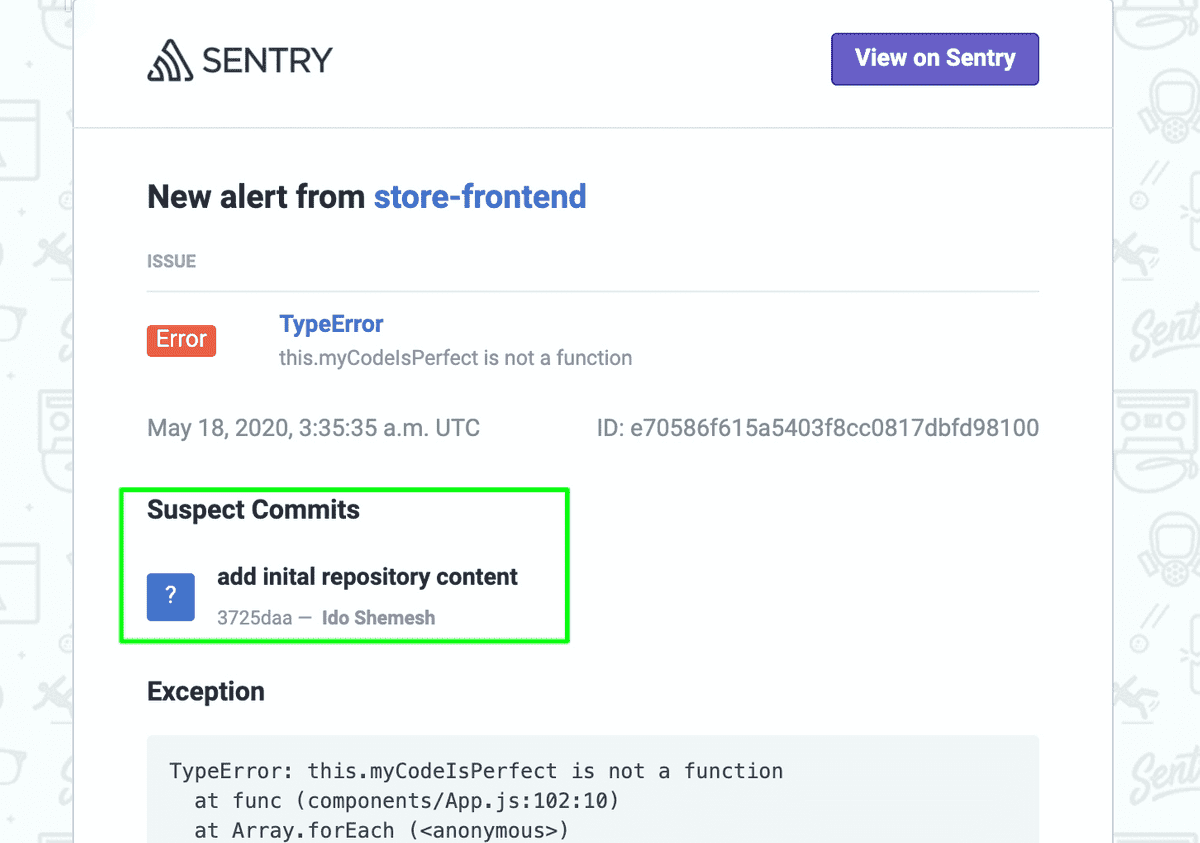
Click View on Sentry to open the issue page
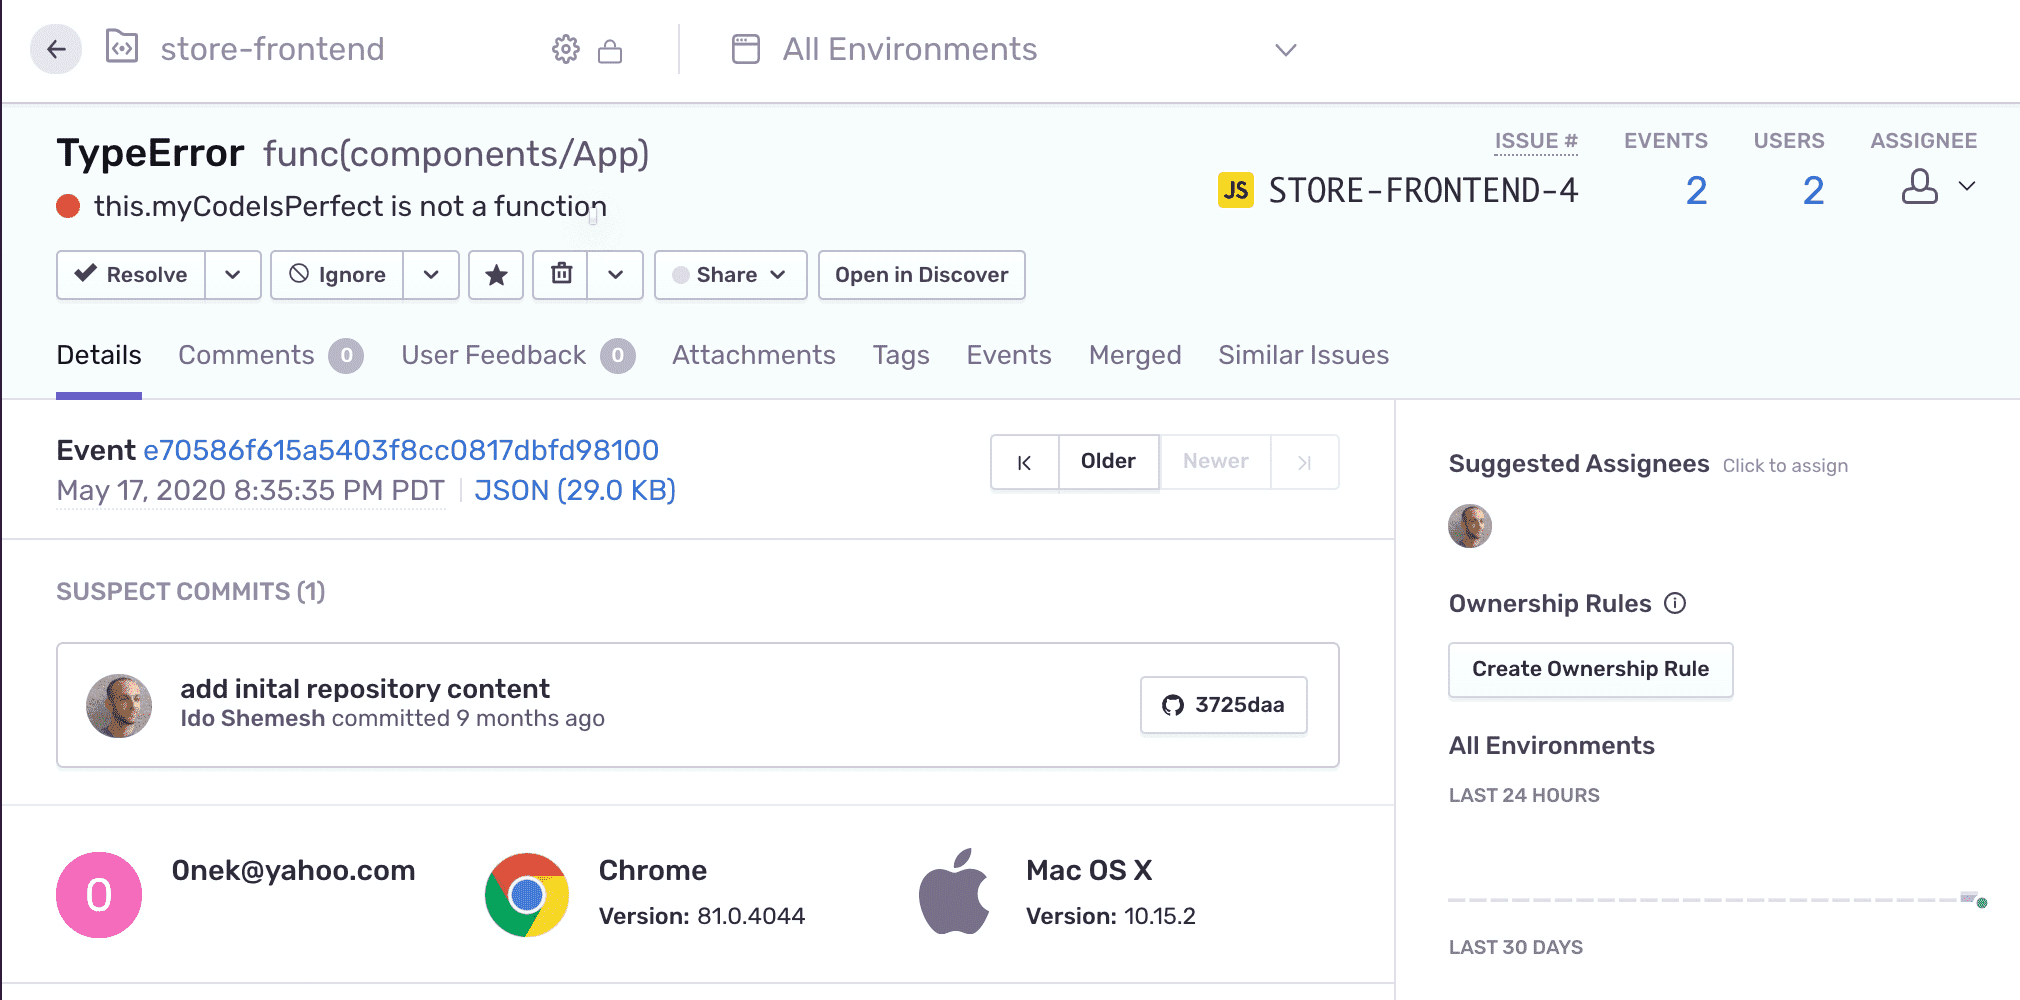
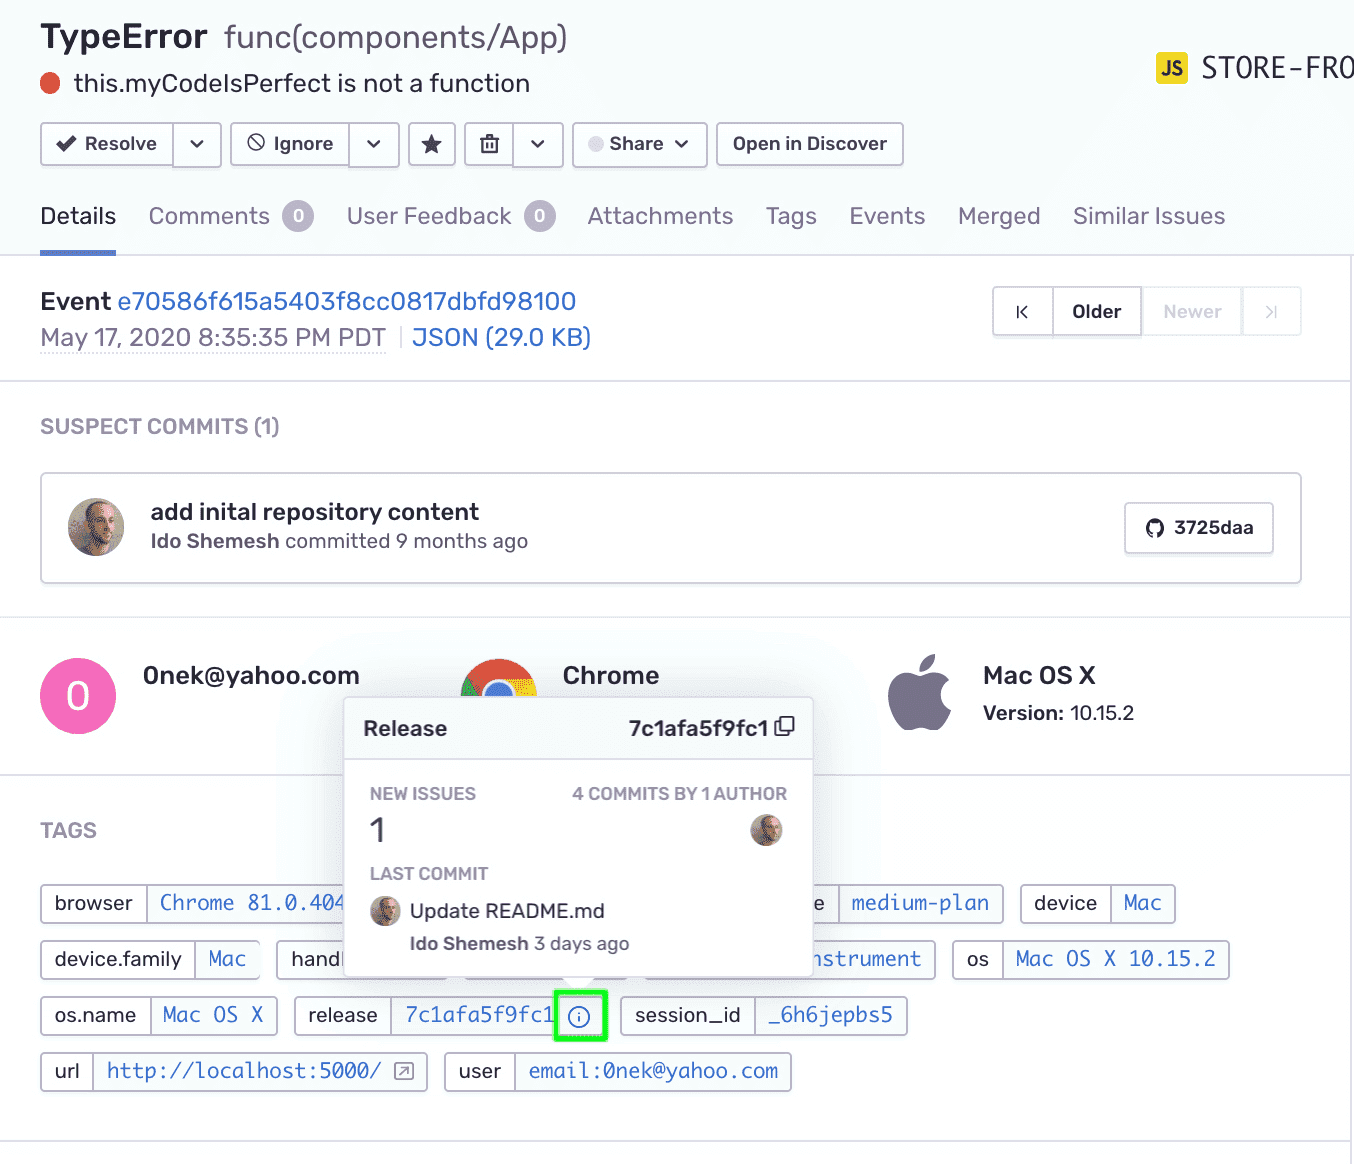
In the main panel, notice the
SUSPECT COMMITSsection now points to a commit that most likely introduced the error. You can click on the commit button to see the actual commit details on GitHubIn the right-side panel, under
Suggested Assignees--- you'll see that the author of the suspect commit is listed as a suggested assignee for this issue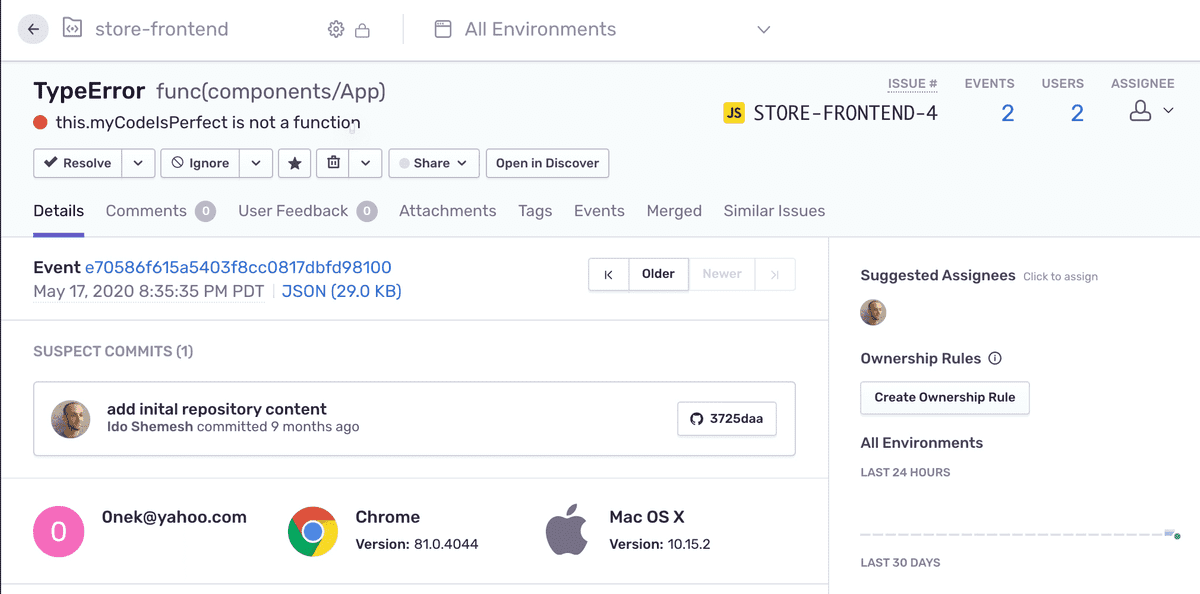
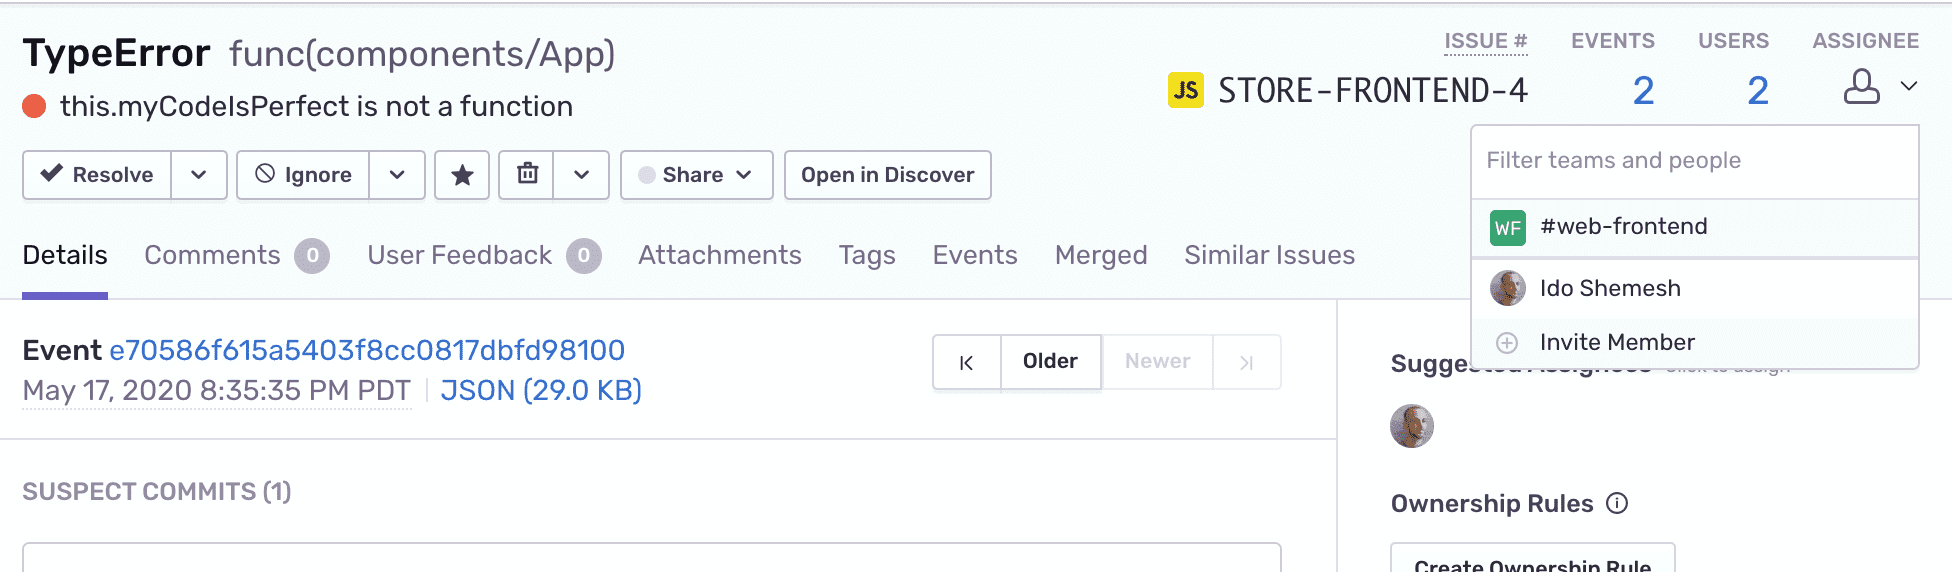
You can assign the suggested assignee to the issue by clicking on the icon. However, in this case, the commit originates in the repository upstream, and the suggested assignee is not part of your organization. Alternatively, you can manually assign the issue to other users or teams assigned to the project.
Click on the
ASSIGNEEdropdown and select one of the project users or teams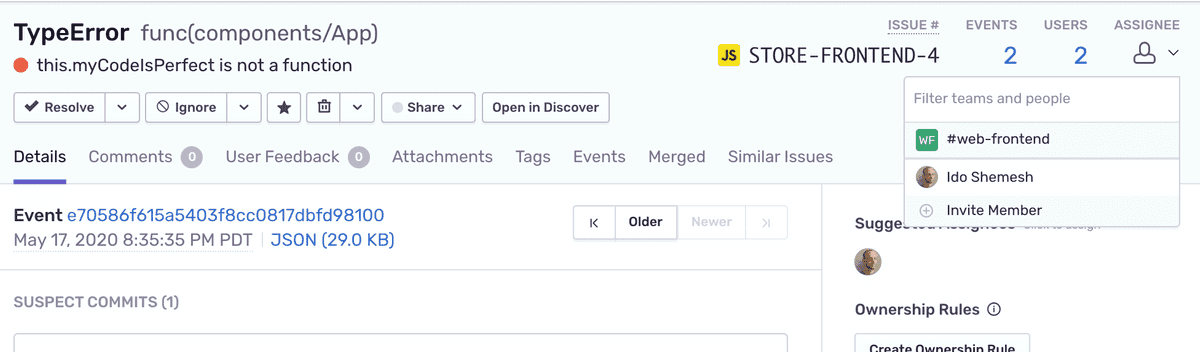
From the main panel, find the
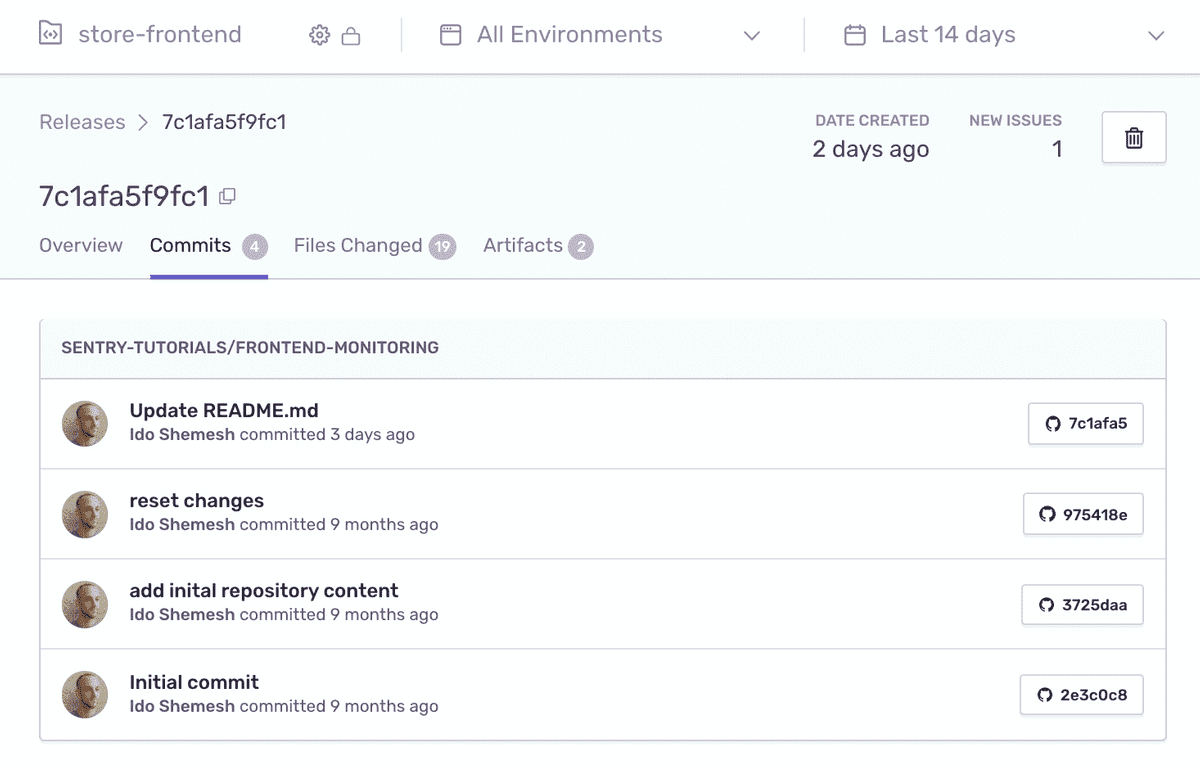
releasetag and hover over theiiconIn the release popup, notice the release now contains the commit data
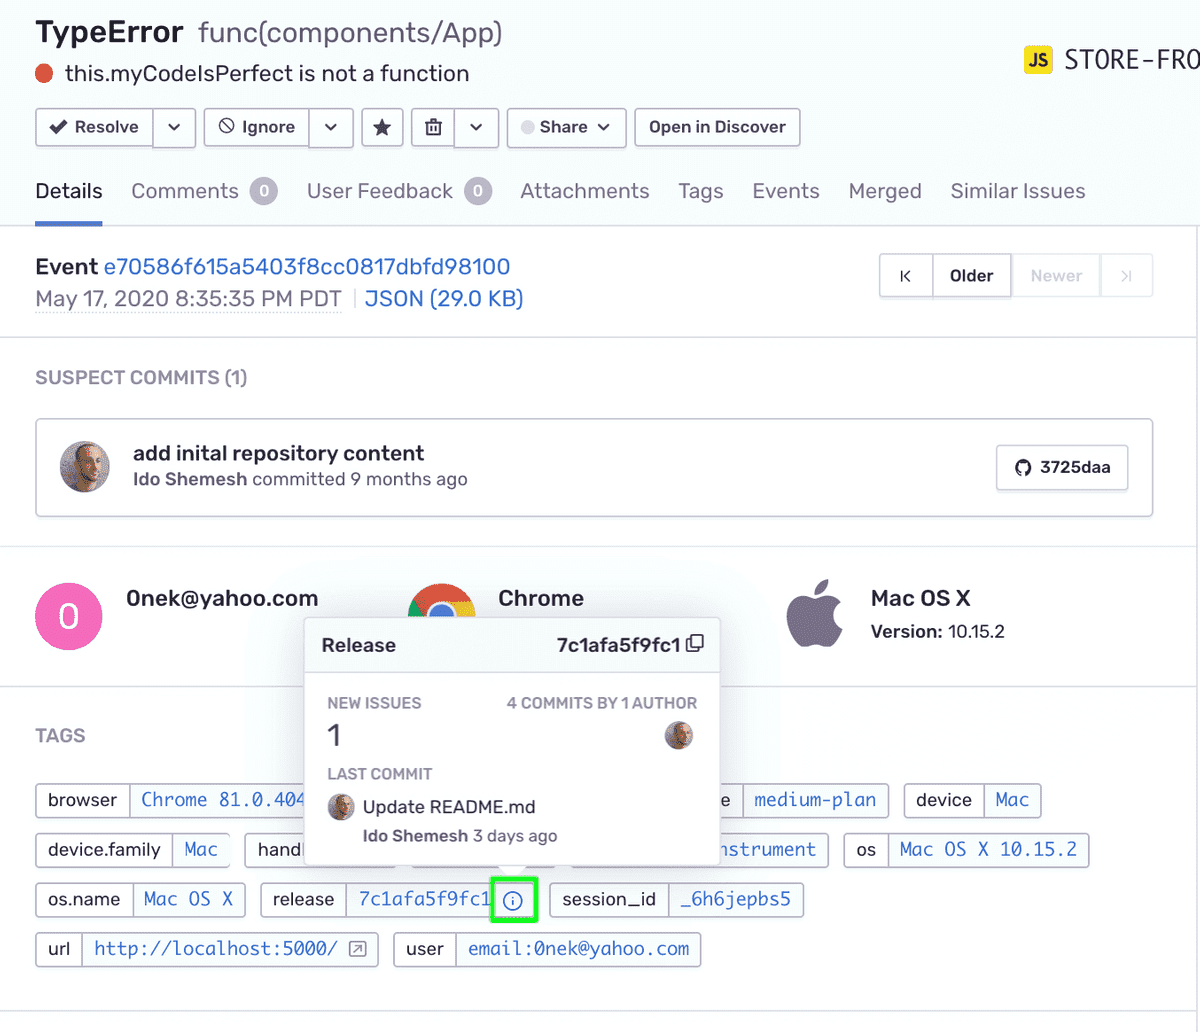
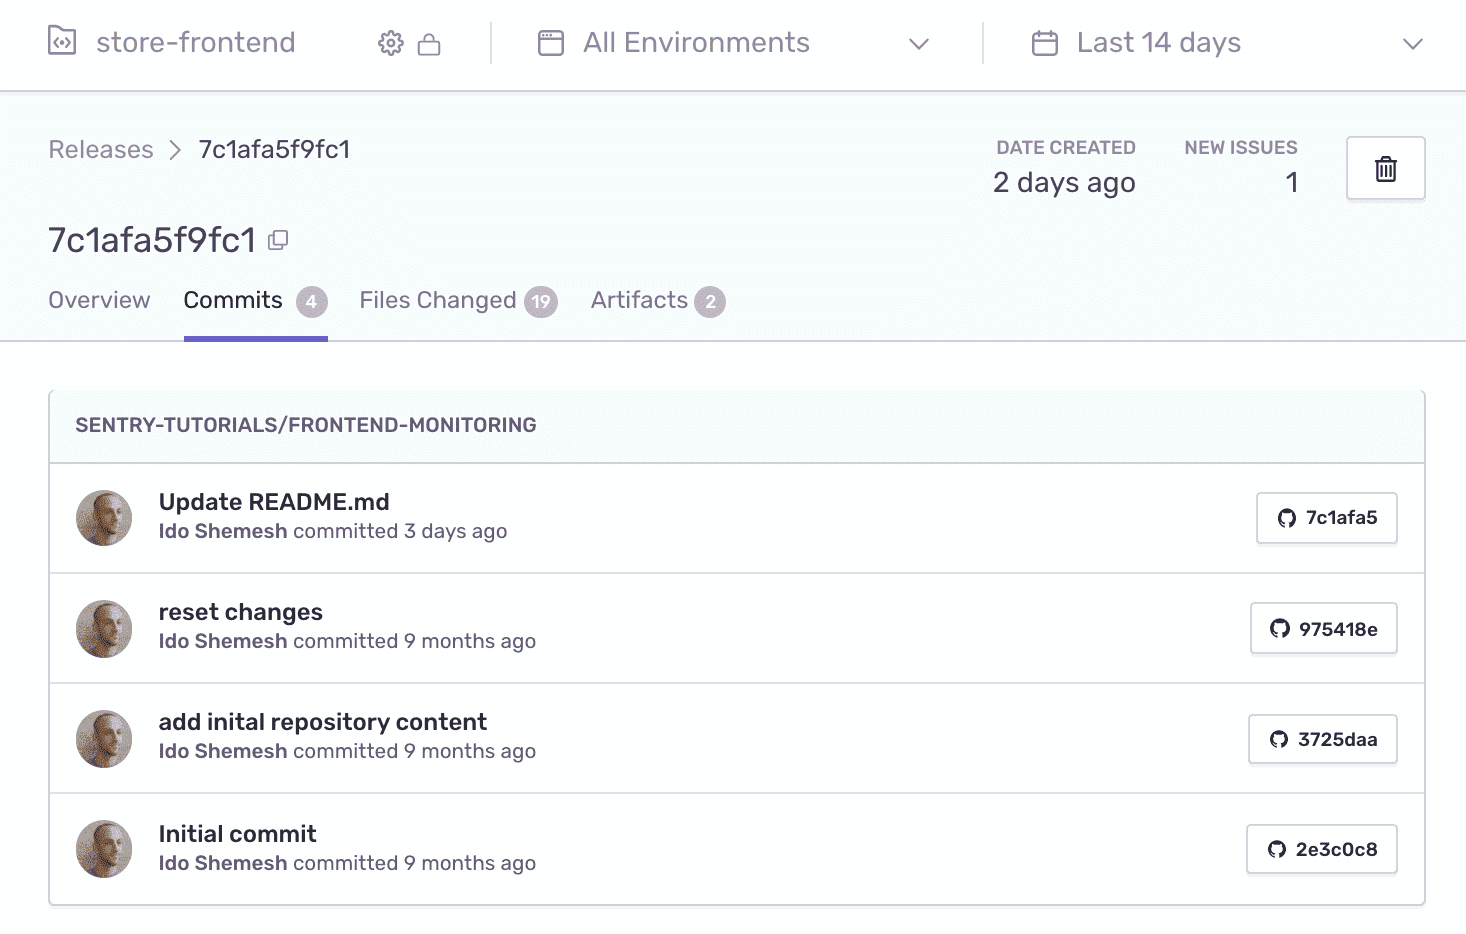
Click on the release
iicon to open the release details pageSelect the
Commitstab. Notice that release now contains the associated list of commits